Thursday, June 26, 2014

Party Time: Minecraft Themed Birthday

Like many almost 8 year olds out there, my son was obsessed with the MineCraft video game. So when it came time to pick the theme for his birthday party, this was kind of a no-brainer. At the time however, I was not that familiar with the details of the game. I decided to educate myself, so I watched some online tutorials, asked him some questions, and soon I felt I was good to go. One word to mostly sum it up: square. Everything in the world of MineCraft is pixelated and therefore made of squares, so I had to think "inside" the box. 

Here is the tutorial I watched (I also included it in my Evite, in case others were unfamiliar): 

And now on to the party details of our "MineCraft Madness" party . . . 

DECOR:

On the front door, I hung a vintage looking MineCraft poster, purchased at Walmart. Since they were only $5, I got a different poster to hang up inside the house as well. 


I decided I wanted to make a big impact with a large creeper head. To create this, I taped salad size square paper plates (7 inch) in shades of green and black to the wall.  I covered the food table with a "grass" tablecloth.  I also picked up a few large square bowls for food and large square dinner plates for the buffet. All of these items were purchased at Party City.
http://www.partycity.com/product/kiwi+paper+square+dessert+plates+20ct.do?from=Search&navSet=square%20plates&bypass_redirect=1


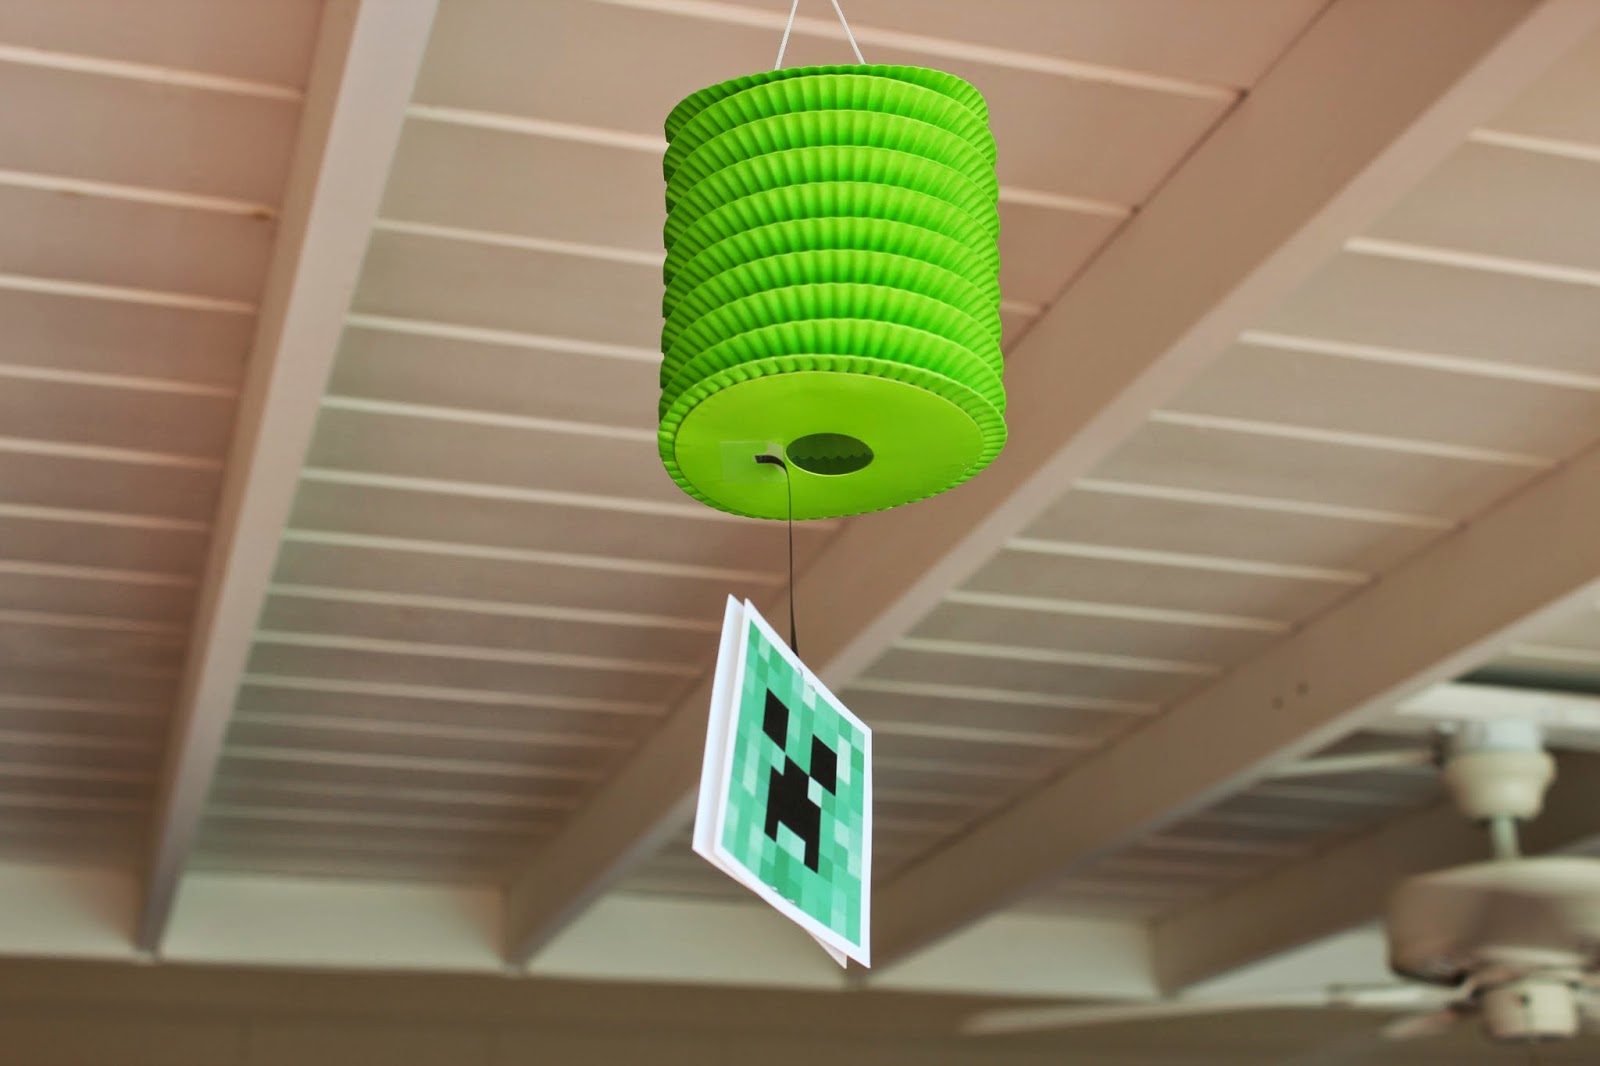
I drew creeper heads and TNT with a sharpie on heliums balloons. I also added little creeper heads to a paper lanterns garland from Party City.  http://www.partycity.com/product/kiwi+lantern+garland+12ft.do?from=Search&navSet=green%20lantern%20garland&bypass_redirect=1


This MineCraft banner was purchased on Etsy (instant download, then printed and cut out at home).


https://www.etsy.com/transaction/136811758

ACTIVITIES:


Since "crafting" is how you create things you need in MineCraft, I decided on a crafting area at the party. Kids were able to make a pickaxe with popsicle sticks and tin foil or create a "skin" with small squares of paper. I pre made the masks by cutting out eye holes and a mouth and attaching them to popsicles sticks. This saved a ton of time at the party!


FOOD:


I used food directly from the MineCraft game for our buffet (melon, carrots and cookies). We also served square pizza (I ordered from a pizza place that cuts their pizza into squares, so handy!). Also from the game, we had "sticks" (pretzels), "spider eyes" (grapes), "water" (blue jello) and "lava" (red jello). The "creeper juice" was Warheads sour apple squeezers (purchased at Walmart) with the label removed and a creeper label added.


The cupcakes were from Safeway. I simply ordered chocolate cupcakes and ask them to decorate them with green "grass" on top. I purchased the cupcake toppers from Etsy (download only, print and cut out at home, attached to toothpicks). https://www.etsy.com/transaction/136486065

For the cake plates, I created TNT labels and glued them to red square plates. 


This awesome party was actually very simple. The food was ridiculously easy, the decorations were simple to create and had a big impact, and were mostly "made" (printed) by me. It was easy on the budget, a good bang for your buck, if you will. If you know a MineCraft lover, I highly recommend throwing them a party like this one, they will LOVE it, trust me.


Wednesday, June 25, 2014

Mommy tip: Hang your kids art

As a parent, and as your kids get older, one thing you will notice is how much STUFF your kids brings home from school, camp, etc. And a large portion of the STUFF, is their precious, hand made art. But over time, it piles up and just becomes clutter and that is sad.

Let's face it, some of it is just better than others. And reality is, you just can't keep it all. Even thought it was made by your precious angel, and they certainly treasure each one as if it were their greatest masterpiece (especially after they spot their beloved creations stuffed in the trashcan), there is no way to keep every. single. piece.

So how do you deal with it all?

Step  1. Be selective. Pick out the stuff they worked hard on and that you want to preserve for antiquities. If its something cute that you feel the need to keep, but it might not be frame worthy, stick it in a file, an expanding file folder works great to keep for each child. Be sure to note the year on the back of each one.

Step 2. Trash it. Wait until they aren't home to toss the rest.  Make sure you either take out the trash before they get home, or it's stuffed way down at the bottom. I know this sounds cruel, but it comes from a place of love :)

Step 3. HANG IT! Take the best of the best, buy cheap frames and frame that stuff! A great way to display it all, is to consolidate it on one gallery wall. The best part, is that you can keep adding to it. Other great places to hang kid creations is in their bathrooms, bedrooms and hallways near their bedrooms. My son did an awesome drawing of a dinosaur in a bathtub, its perfect right outside their shared bathroom. I couldn't have purchased a better piece if I tried.


I get tons of compliments for my kids art gallery wall. It makes my home even more eclectic than it already is, plus my kids get to feel a sense of pride every time they walk by. 

Adventures in baking: Monster cupcakes

So, being the wonderful, amazing friend that I am, I volunteered to bring cupcakes for a monster themed first birthday party for a good friend's son. My first thought was to scratch the whole "homemade" component and just order cupcakes from the bakery. I've recently been on a mission to simplify my life and this just seemed the logical, easiest solution.

But, after a few peeks around Pinterest, and seeing a few easy ideas,  I decided that I was up to the task of baking them myself. Afterall, how much more gratifying would it be to show up with amazingly delicious and adorable cupcakes that I actually made myself. After a much longer period on Pinterest, I settled on brightly colored sprinkles and marshmallow eyeballs on toothpicks. However, after a trip to ABC Cake Decorating and a brief discussion with an expert there, I decided to attempt a "grass" tip to make furry monster cupcakes, complete with various sized sugar eyeballs.

I used this recipe for the cupcakes (the only change I made was to use French Vanilla flavored cake mix). http://www.recipegirl.com/2007/03/16/white-wedding-cake-cupcakes/

and I used her buttercream frosting recipe and followed the directions exactly: http://www.recipegirl.com/2007/03/16/wedding-cupcake-buttercream/

I decided on bright colors for my little monsters and bought special food coloring at the cake decorating store, I went with red, blue, green and orange (I added lots of drops to make these colors extra bright).


I also decided that striped cupcakes would be way more exciting than one simple color each. I meticulously scooped in layers of two or three colors into each cup. This turned out to be an extremely time consuming step, but in my opinion, very worth it. They were adorable!

 Notice the bright hues!

Next was the frosting. For this, I used the same colors as my cupcakes.


The grass tip was a bit of a challenge for me, but hey, these are monsters and they don't need to be perfect. With the addition of the eyeballs and mouths, they were perfectly wonderful in my opinion.


Here are a few shots of the other decor and food the hostess had an the party. 


End result = Success! One happy little boy, one happy mama and a happy me :)